Creating a domain in AWS Route 53 and point it to GitHub Pages
![]()

This is my very first post in this blog I have created to document my progress toward learning about public cloud providers. I am a firm believer in “learning by doing” to help me learn more quickly and it is for this reason that I am starting today with this blog. Today, I am registering a new domain in AWS Route 53, creating the necessary records, and pointing them to this blog. The blog has been created using Jekyll as a static site generator (written in Ruby) and it is hosted in GitHub Pages for free.
Creating this blog in GitHub Pages following and the documentation (see Types of GitHub Pages sites) required the original URL to be exactly <username>.github.io. I wanted to have my own domain and I am using AWS Route 53 to register myjourneytocloud.com. I am documenting the steps that were taken to accomplish this using the AWS Management Console.
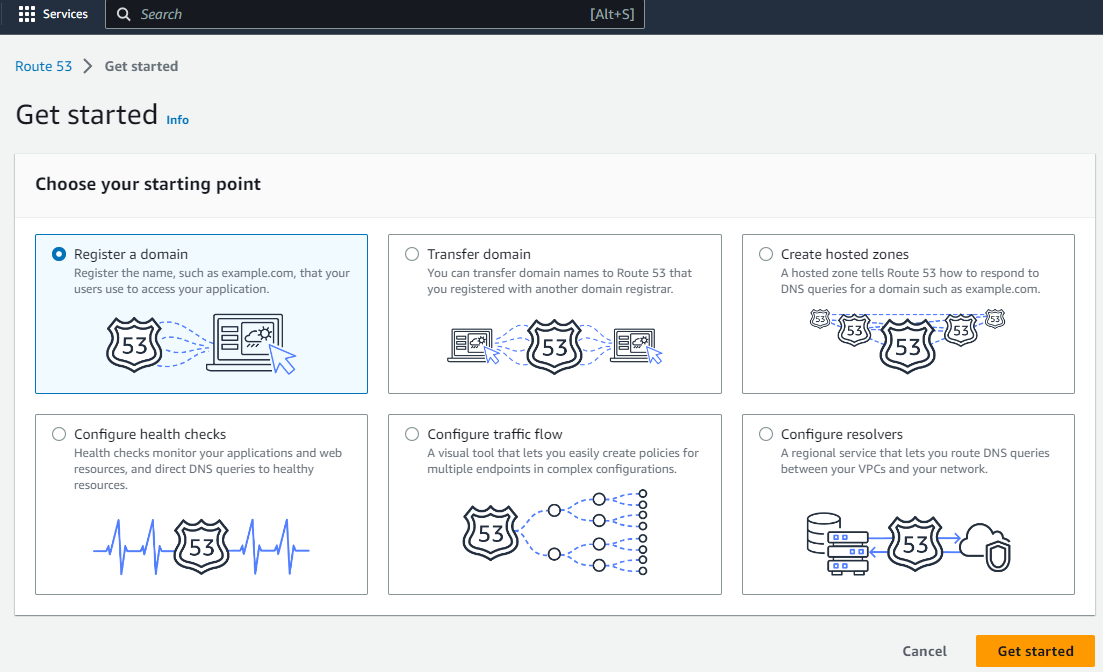
- Starting from the Route 53 service in the AWS Management Console initiate the wizard
Select Register a domain
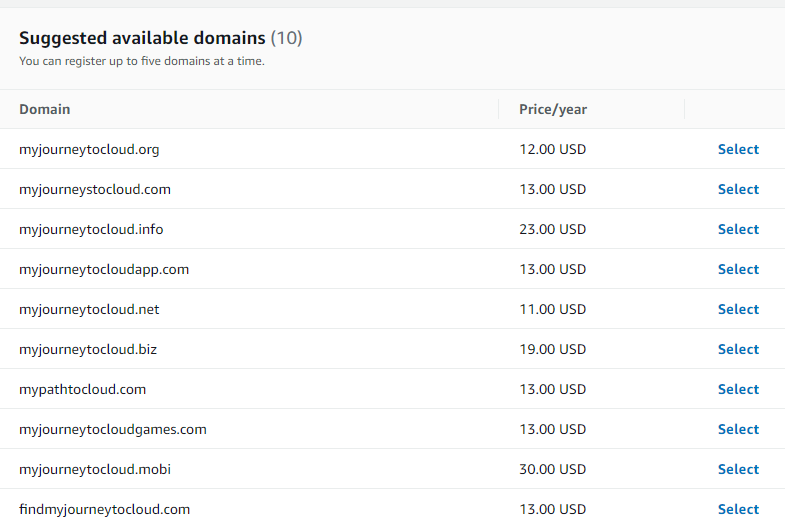
- Look to see if the domain is available. In my case, myjourneytocloud.com was already taken. However, I noticed myjourneytocloud.net is available so took it. Select the desired domain and click on the button that shows up Proceed to checkout

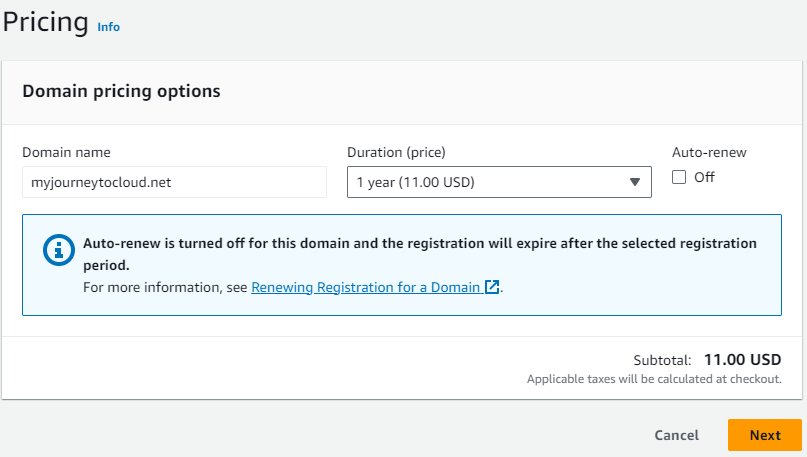
- The next screen asks for how long you want to register the domain and it reflects the cost of it. This screen also shows the option to enable or disable auto-renew. In my case, I chose 1 year and unchecked the Auto-renew checkbox.
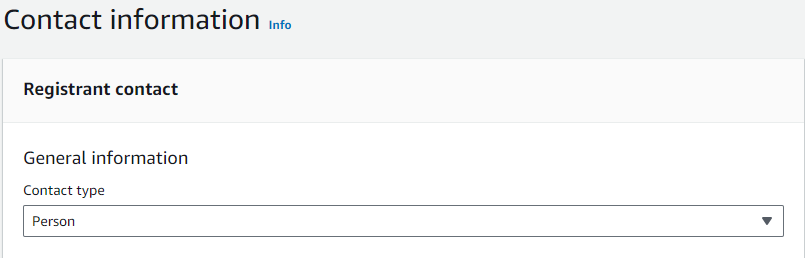
The next screen asks for Contact Information such as name, email, phone number, address, Country, State, City, Zip code / Postal code and a few privacy options such as:
Admin Contact (enable disable) - Same as registrant contact Tech contact (enable disable) - Same as registrant contact Privacy contact (box to check uncheck) - Turn on privacy protection for all contacts of myjourneytocloud.net. When you turn on privacy protection, contact information is hidden from WHOIS queries.
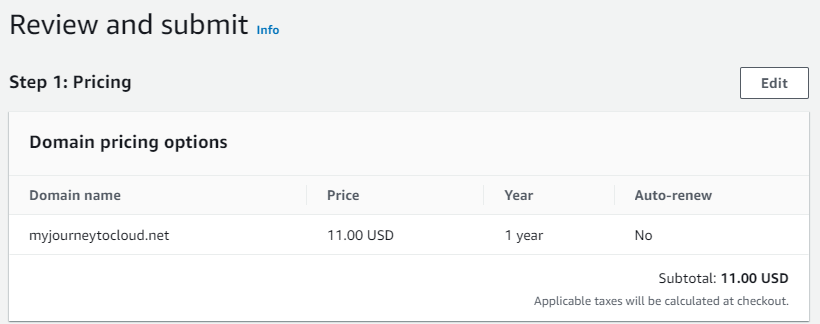
- Finally, the Review and submit section shows all the information entered to be confirmed. Just click on the appropriate button to complete the process of registering a new domain if all looks good.
As a note, Route 53 is primarily a global service
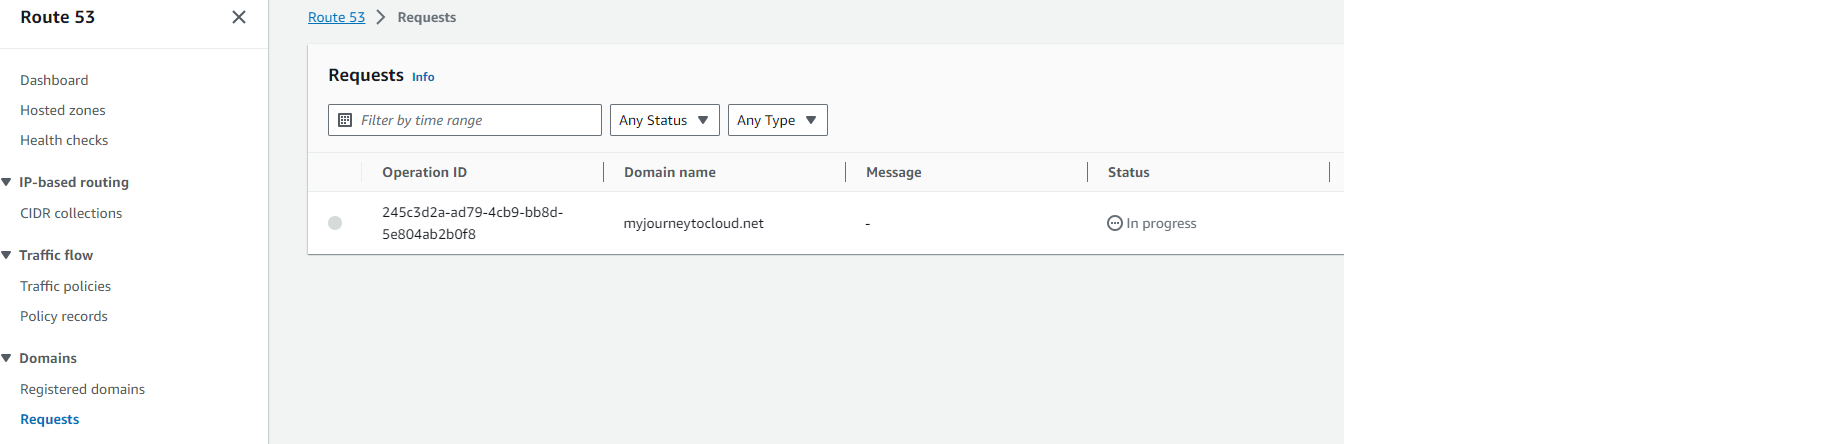
- To see the status of creating the new Domain, on the left navigation bar go to Domains > Requests. The domain registration should be in progress.
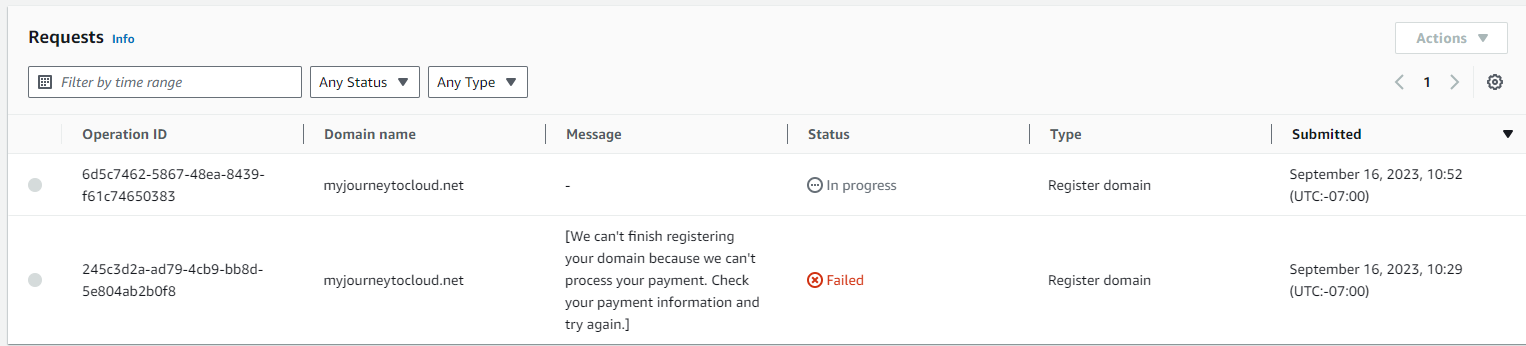
In my case, I had to update the credit card information in the root account. Once done I repeated the process of registering the domain.
During this process, I received a few emails in my inbox:
1
2
3
4
5
- One from my bank letting me know that a charge was done to my credit card
- Another email with the invoice from AWS
- Another one from AWS including a link to verify the email address I put when registering the domain (step 4)
- A fourth email from AWS informing me that my email was successfully verified for domain registration
- An finally, an email from AWS letting me know the registration of the domain succeeded
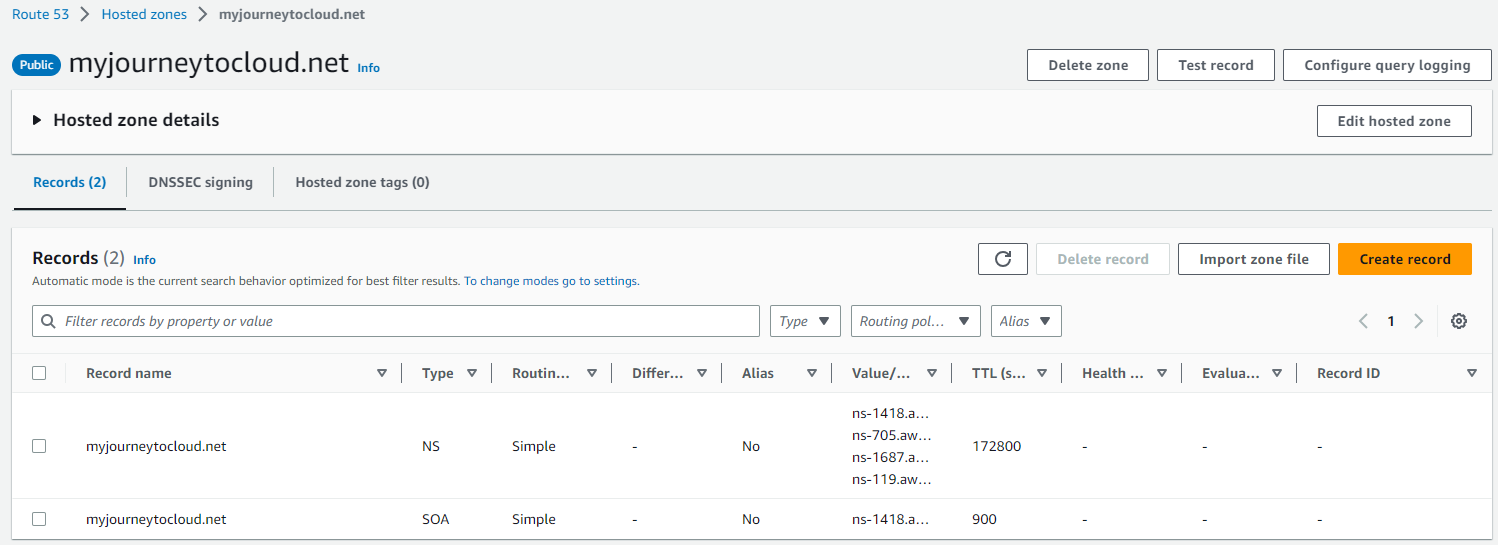
- Once the Domain has been fully created, on the left navigation bar go to the Hosted Zone section and open the existing Hosted Zone to create two new Records. The existing Hosted Zone was created when the domain process was completed.

Click on Create record
- To create the record, you the DNS IP addresses of GitHub which are found in GitHub’s documentation section Configuring an apex domain
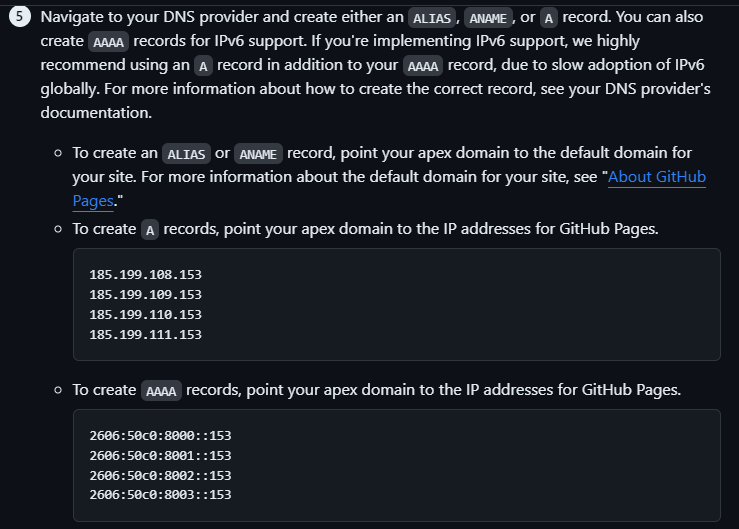
Create the first record as follows:
- Leave the subdomain field blank
- Record type is A
- Value is all the IP addresses of GitHub DNS

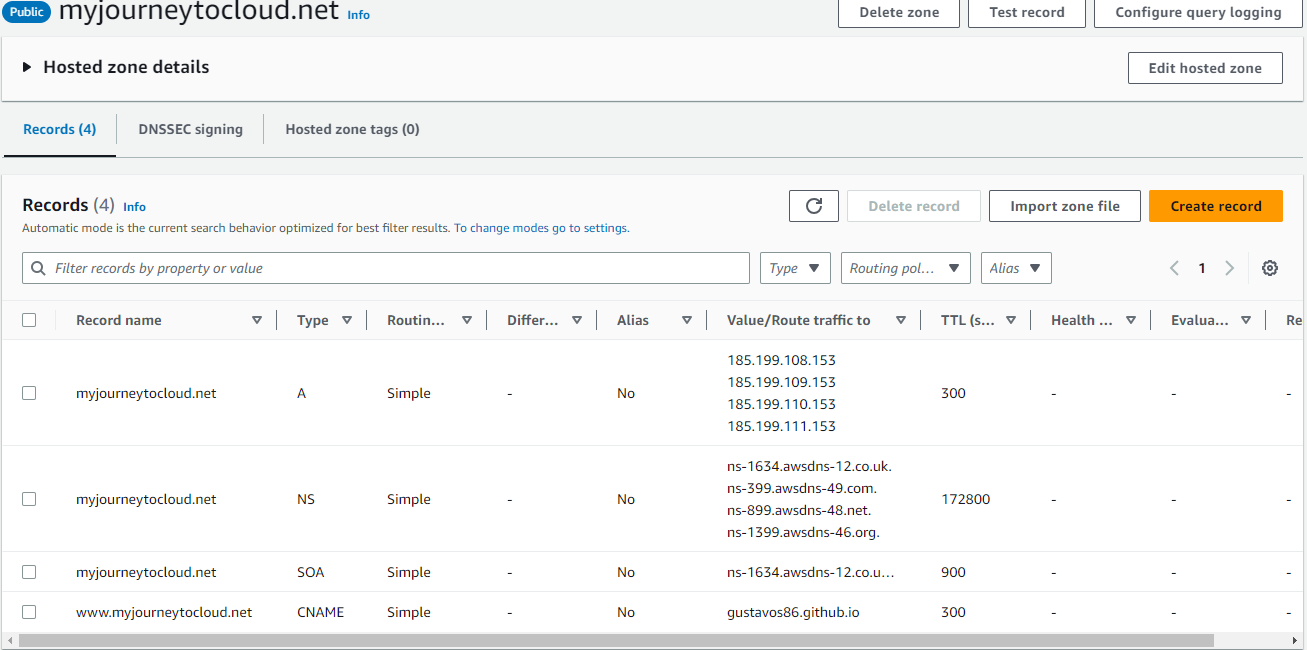
Create the second record as follows:
- In subdomain type www
- Record type is CNAME
- Value is
<username>.github.iofor your GitHub account (in my casegustavos86.github.io)

- The result should look similar to the following screenshot
- In your GitHub repo (in my case https://github.com/gustavos86/gustavos86.github.io/) go to Settings > Pages
Under section Custom Domain add your DNS and click on the save button.
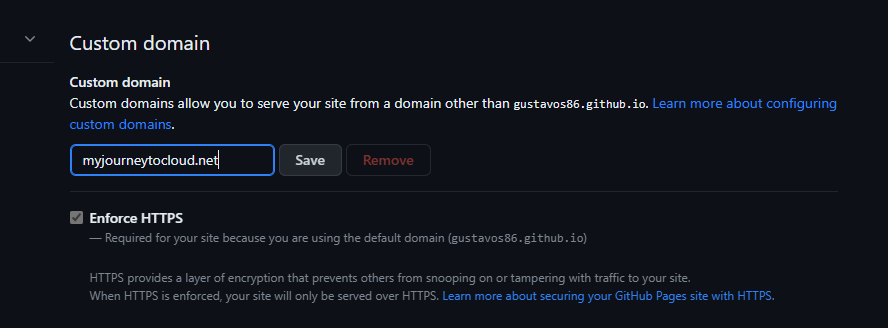
Wait for the validation to complete. It should take just a few seconds.

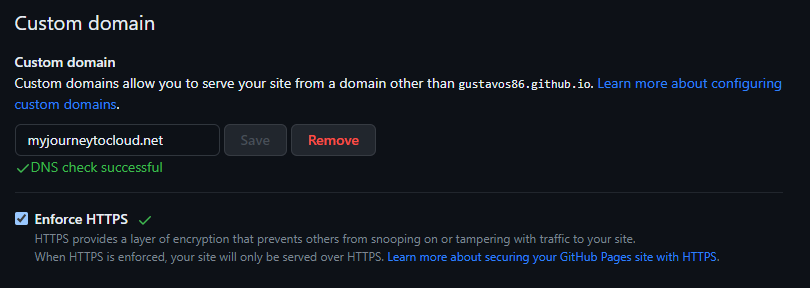
The result should look like the following screenshot. Make sure you check the Enforce HTTPS checkbox as well.
This should have created a file named CNAME in the project main folder. In my case https://github.com/gustavos86/gustavos86.github.io/blob/main/CNAME and the content is just:
1
myjourneytocloud.net
Common error
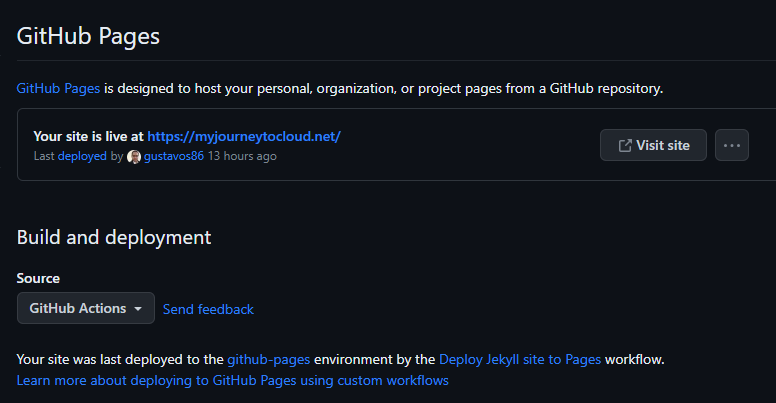
- If you are getting a blank page with raw text of index.html file or similar when visiting your site

What you have to do is change the GitHub Pages setting to Build and deployment Source : GitHub Actions
- Finally, if you are using Jekyll just like me, you may want to update the
_config.ymlfile:
1
2
3
4
. . .
# fill in the protocol & hostname for your site, e.g., 'https://username.github.io'
url: https://www.myjourneytocloud.net
. . .
That’s it, now https://www.myjourneytocloud.net/ and https://myjourneytocloud.net/ point to this blog.